
7 Stunning DIY Holiday Ornaments Anyone Can Make
Discover 7 beautiful DIY holiday ornaments that will elevate your festive decor. Get inspired and start creating your own unique decorations today!

There’s something truly special about decorating a Christmas tree with ornaments that hold personal meaning. While store-bought decorations are beautiful, creating your own stunning DIY holiday ornaments brings a unique warmth and character to your holiday decor. Crafting your own decorations is a wonderful way to bring the family together, create new traditions, and make memories that will last for years.
This guide features seven creative and beautiful DIY Christmas ornaments that anyone can make, regardless of skill level. From rustic, nature-inspired pieces to glamorous, glittery baubles, you’ll find a project that perfectly suits your style. So gather your supplies, put on some festive music, and get ready to add a personal touch to your Christmas tree this holiday season.
Raquel's Reviews earns from purchases, no extra cost to you!
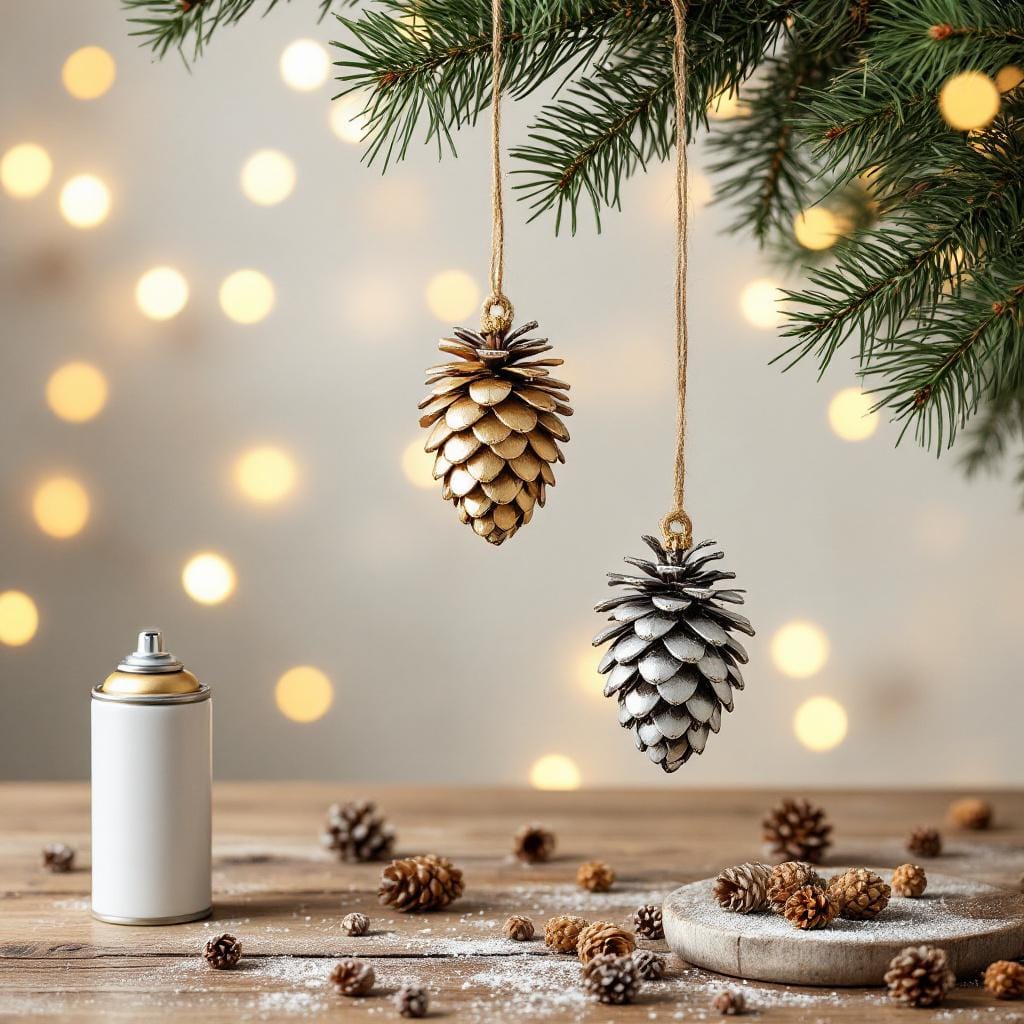
Transform humble pinecones into elegant Christmas tree ornaments with a touch of metallic paint. This simple craft is perfect for adding a rustic yet glamorous feel to your holiday decor.
Materials:
- Pinecones (foraged or from a craft store)
- Metallic gold or silver spray paint
- Twine or thin ribbon
- Newspaper or a drop cloth
- Hot glue gun and glue sticks
Steps:
- Prep: Lay down newspaper or a drop cloth in a well-ventilated area to protect your workspace. Make sure your pinecones are clean and completely dry.
- Paint: Lightly spray paint the pinecones from all angles, allowing the natural brown to show through for a rustic look. For full coverage, apply a second coat after the first has dried.
- Create Hanger: Cut a 6-inch piece of twine or ribbon. Form a loop and tie a knot at the end.
- Attach: Apply a small amount of hot glue to the top center of the pinecone and press the knotted end of the twine loop firmly into the glue until it sets.
Pro Tip: For a frosted look, lightly brush white craft paint onto the tips of the pinecone scales before adding the metallic spray paint.
Product Recommendation: A high-quality metallic spray paint is essential for giving your pinecones a rich, shimmering finish.

Create a timeless and wonderfully fragrant decoration with dried orange slices. This simple, country-inspired garland looks as beautiful draped on a Christmas tree as it does on a mantelpiece.
Materials:
- 3-4 large navel oranges
- Baking sheet and parchment paper
- Sharp knife
- Twine or clear fishing line
- Large needle or skewer
Steps:
- Slice: Preheat your oven to 200°F (95°C). Slice the oranges into thin, uniform rounds, about 1/4-inch thick. Pat them dry with a paper towel to remove excess moisture.
- Bake: Arrange the orange slices in a single layer on a parchment-lined baking sheet. Bake for 3-4 hours, flipping them every hour until they are dry to the touch and slightly translucent.
- Cool: Let the slices cool completely on a wire rack. They will continue to harden as they cool.
- String: Use a large needle or skewer to poke two holes near the top of each orange slice. Thread your twine through the holes to create your garland, spacing the slices as desired.
Pro Tip: Add other natural elements like cinnamon sticks or bay leaves between the orange slices for extra fragrance and visual texture.
Product Recommendation: Use a sturdy baking sheet to ensure your orange slices dry evenly without warping.
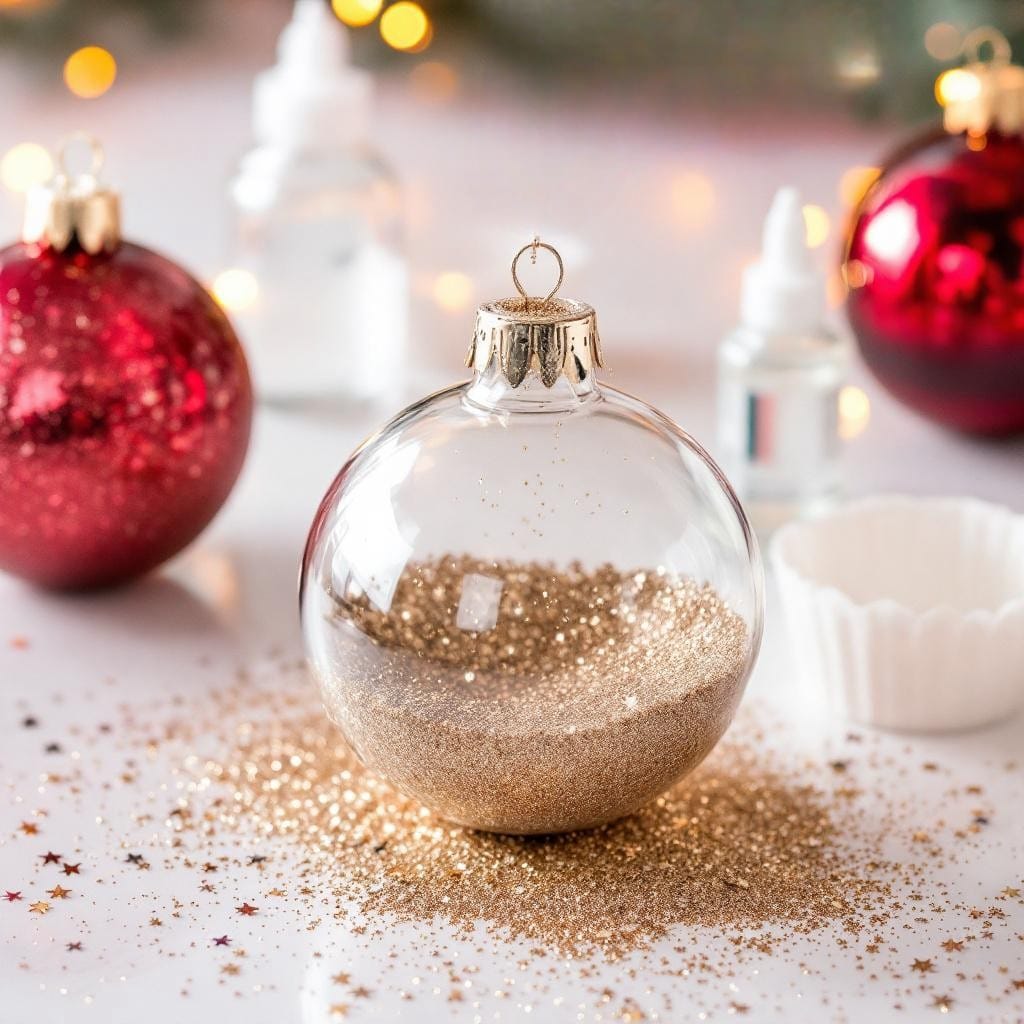
Add some serious sparkle to your tree with custom glitter ornaments. This is a fun and surprisingly mess-free way to create vibrant, eye-catching Christmas decorations.
Materials:
- Clear glass or plastic ornaments
- Floor polish or a clear craft glue that dries clear
- Fine glitter in various colors
- Small funnel
- Paper cups
Steps:
- Prepare Ornament: Remove the metal hanger from the top of a clear ornament.
- Coat Inside: Pour a small amount of floor polish or slightly watered-down craft glue into the ornament. Swirl it around gently to coat the entire interior surface, then pour out the excess.
- Add Glitter: Using a small funnel, pour a generous amount of your chosen glitter inside the coated ornament.
- Cover & Shake: Cover the opening with your thumb and shake well until the glitter has covered the entire inside surface.
- Finish: Pour out the excess glitter onto a paper cup (you can save it for another ornament). Let the ornament dry completely before replacing the metal hanger.
Pro Tip: Create ombre glitter ornaments by adding a second, complementary color of glitter and gently tilting the ornament to let the colors blend.
Product Recommendation: A set of clear glass ornaments provides the perfect blank canvas for your glittering DIY ideas.
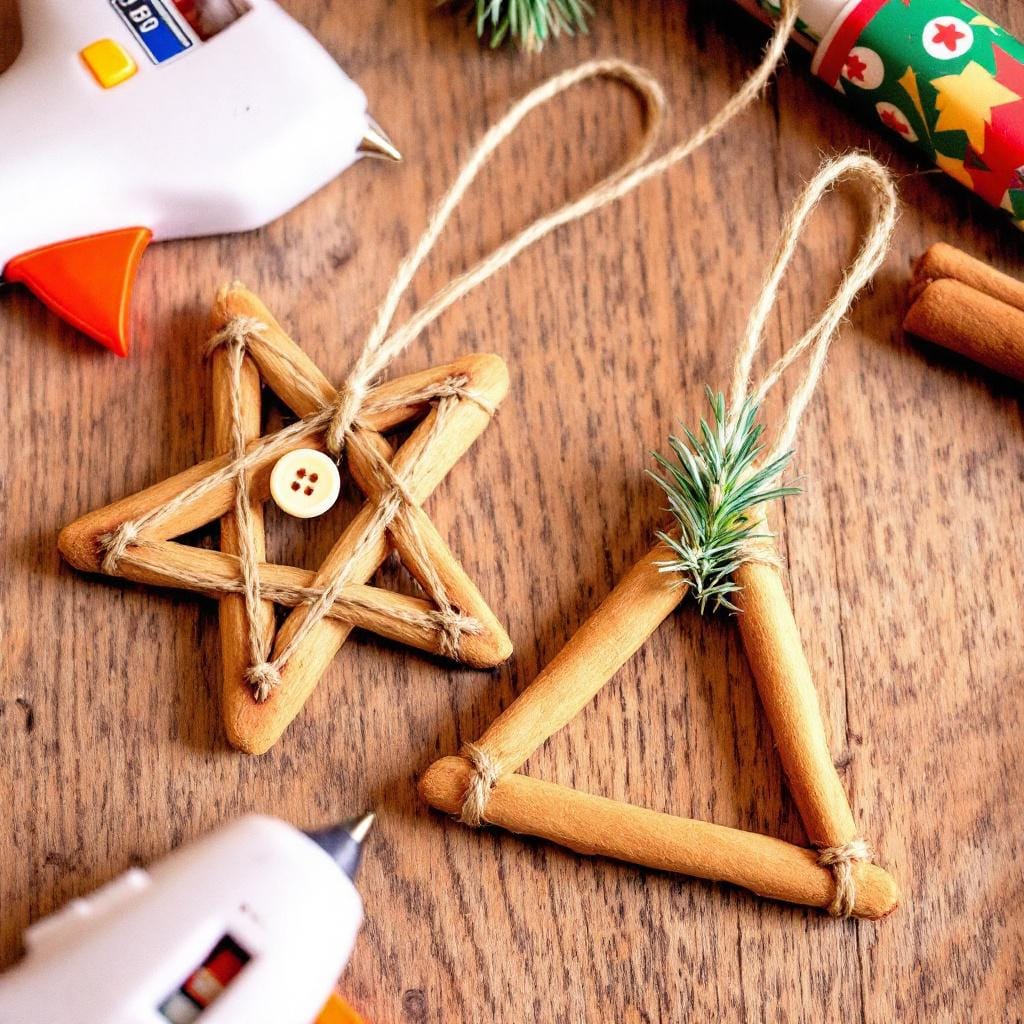
These adorable and fragrant ornaments are incredibly easy to make and perfect for a family craft day. The warm smell of cinnamon will fill your home and add to the holiday spirit.
Materials:
- Cinnamon sticks (5 per star, 3 per tree)
- Hot glue gun and glue sticks
- Twine or thin ribbon for hanging
- Optional: small buttons, beads, or greenery for decoration
Steps:
- Design Shape: For a star, arrange five cinnamon sticks in a star shape, overlapping the ends. For a tree, create a triangle with three sticks and glue a small piece of a fourth stick at the bottom for the trunk.
- Glue Together: Carefully apply a dot of hot glue at each point where the cinnamon sticks intersect. Hold them in place for a few seconds until the glue sets.
- Add Hanger: Cut an 8-inch piece of twine. Form a loop and glue the ends to the back of the top point of your ornament.
- Decorate: Glue a small button or a few green leaves to the center of your star or onto your tree as "ornaments" for an extra cute touch.
Pro Tip: Make sure your cinnamon sticks are relatively straight and uniform in length for the neatest-looking shapes.
Product Recommendation: A mini hot glue gun is perfect for this project, offering precise control for gluing the small connection points.
Capture precious memories by transferring photos onto wood slices. These DIY Christmas ornaments make for heartfelt gifts and cherished keepsakes for your own family tree.
Materials:
- Smooth wood slices with pre-drilled holes
- Photos printed on regular paper with a laser printer
- Gel medium
- Foam brush
- Damp cloth
- Ribbon for hanging
Steps:
- Print & Cut: Print your photos on a laser printer (inkjet will smear) and cut them to fit the wood slices. Remember the image will transfer in reverse, so flip photos with text.
- Apply Gel: Using a foam brush, apply a thick, even layer of gel medium to the photo side of the paper and to the surface of the wood slice.
- Adhere Photo: Press the photo, image-side down, onto the wood slice. Smooth out any air bubbles gently with your fingers or a credit card and wipe away excess gel. Let it dry completely for at least 8 hours or overnight.
- Rub Away Paper: Once dry, take a damp cloth and gently rub the paper backing in a circular motion. The paper will start to pill and come off, revealing the transferred image on the wood.
- Seal & Hang: Let the ornament dry. You can apply a thin top coat of gel medium to seal it. Thread a piece of festive ribbon through the hole to hang.
Pro Tip: Don't oversaturate the paper when rubbing it off. Use a damp, not soaking wet, cloth and apply gentle, consistent pressure to avoid rubbing off the image itself.
Product Recommendation: Find a quality Mod Podge or gel medium at any craft store to ensure a clean image transfer.

Use your favorite holiday cookie cutters as a template for these soft and charming felt ornaments. This is a fantastic sewing-free craft project that is fun for both kids and adults.
Materials:
- Felt in various colors (green, red, white, brown)
- Holiday cookie cutters (star, gingerbread man, tree)
- Fabric pen or marker
- Fabric scissors
- Hot glue or fabric glue
- Cotton balls or stuffing
- Thin ribbon or embroidery thread
Steps:
- Trace Shape: Place a cookie cutter on a piece of felt and trace around it with a fabric pen.
- Cut Shapes: Cut out two identical shapes for each ornament.
- Glue Edges: Take one of the felt shapes and apply a thin line of hot glue or fabric glue around the edge, leaving a small opening for stuffing.
- Stuff: Gently push small pieces of cotton or stuffing into the ornament through the opening until it's lightly puffed.
- Seal & Hang: Glue the opening shut. Cut a 5-inch piece of ribbon, fold it into a loop, and glue the ends to the back of the ornament.
Pro Tip: Decorate your felt ornaments before gluing the two halves together. Use smaller felt cutouts, beads, or puffy paint to add details like eyes on a gingerbread man or ornaments on a tree.
Product Recommendation: A set of holiday cookie cutters gives you plenty of fun shapes to work with for this and future baking projects.
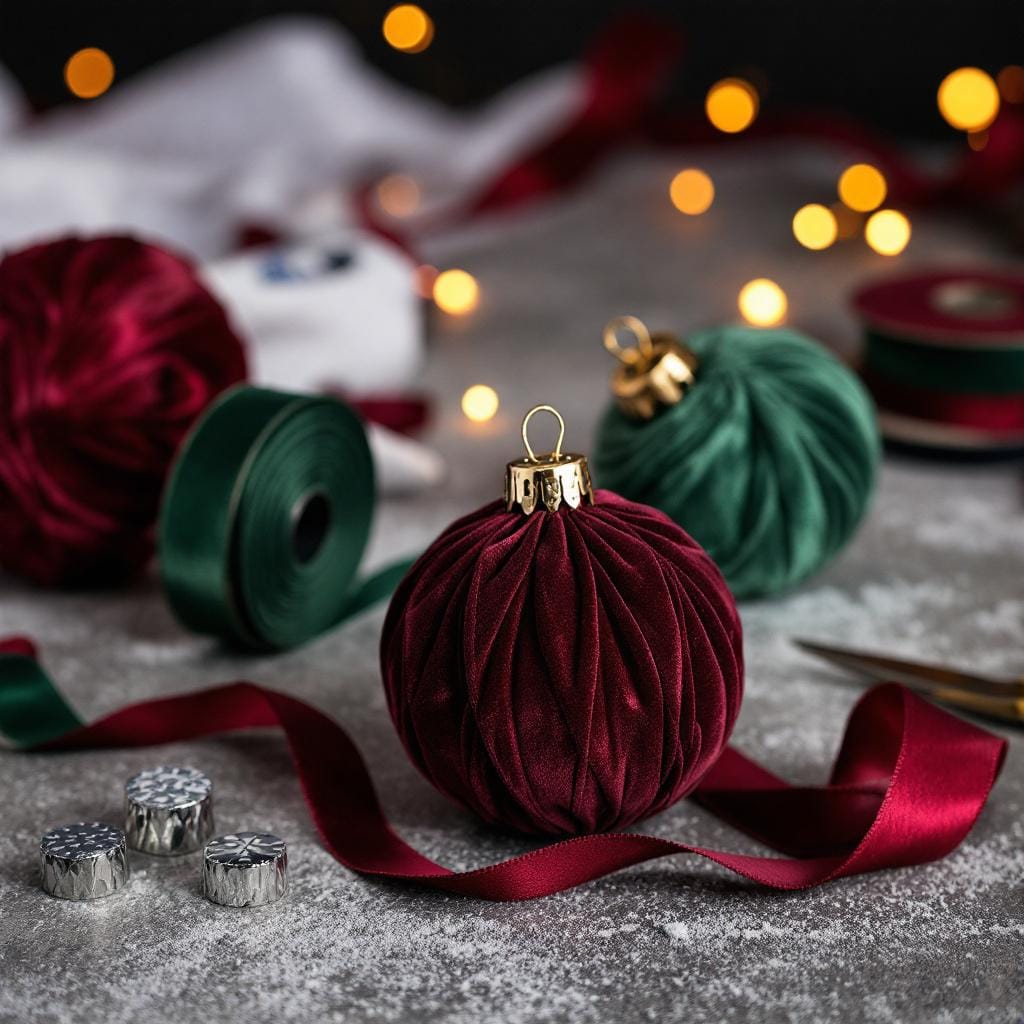
Update old or plain Christmas baubles with beautiful ribbon. This incredibly simple technique can be adapted to any color scheme and adds sophisticated texture to your Christmas tree.
Materials:
- Plain ball ornaments
- Spool of 1/2-inch to 1-inch wide ribbon
- Hot glue gun
- Scissors
Steps:
- Start Wrapping: Remove the metal cap from the ornament. Apply a dot of hot glue near the opening and press the end of your ribbon onto it.
- Wrap Down: Begin wrapping the ribbon neatly around the ornament, slightly overlapping the edges to ensure no gaps are visible. Work your way down to the bottom.
- Secure at Bottom: Once you reach the bottom, add another dot of hot glue to secure the ribbon. Cut the ribbon from the spool.
- Wrap Up: Start a new line of glue and ribbon at the bottom, and wrap your way back up to the top, covering the other half of the ornament.
- Finish: Secure the end of the ribbon at the top with a final dot of glue. Trim any excess ribbon and replace the metal cap.
Pro Tip: Use two different colors or textures of ribbon and alternate them as you wrap for a custom, striped look.
Product Recommendation: A spool of high-quality velvet or satin ribbon adds a touch of luxury and elegance to this simple DIY project.
Get Crafty This Holiday Season!
We hope these DIY ideas inspire you to get crafty this holiday season! Creating your own ornaments is a rewarding project that adds a personal and heartfelt touch to your home. We'd love to see your creations—tag us in your photos on social media! For more holiday tips and creative projects, be sure to subscribe to our newsletter.
Happy Hosting 😊🎉
Related Reads – DIY Holiday Ornaments
For more holiday inspiration, check out these guides to help you plan the perfect festive celebration.